Learn 6 essential Filipino cooking techniques that make authentic dishes taste like home. Master ginisa, adobo, nilaga & more with this beginner’s guide.
I’ll never forget the first time my daughter asked me to teach her how to make adobo. She was about six and fascinated by cooking, specifically Filipino food. This was our bonding time and her connection to heritage through the dishes I grew up eating.
We stood together in the kitchen gathering ingredients: chicken, soy sauce, vinegar, garlic, bay leaves, peppercorns. She measured everything carefully, precisely, like a science experiment.
“Now what?” she asked, holding the vinegar bottle.
“Dump everything in the pot,” I said casually. “Let it simmer until the chicken’s tender. Easy!”
She looked at me, confused. “But for how long? What heat?”
That’s when it hit me: I’d completely skipped over the how or the actual techniques that make adobo taste like adobo. The methods I learned through years of watching my mother, absorbed knowledge that felt automatic to me but was completely foreign to my daughter.
I realized I’d been thinking about Filipino cooking all wrong. It’s not about dumping ingredients in a pot and hoping for the best. It’s not even just about following recipes step-by-step.
Filipino cooking is about understanding the fundamental techniques that make our food taste the way it does. The methods passed down through generations, the tricks and principles that don’t always make it into written recipes because everyone just knows.
Except… not everyone does know. Especially if you’re learning from scratch, teaching someone else, or trying to figure out why your homemade adobo doesn’t taste like your grandmother’s even though you followed the recipe exactly.
Here’s what I discovered: once you understand the basic techniques, everything clicks. Recipes make sense. Flavors come together properly. That elusive taste of home becomes achievable, not accidental.
Why Filipino Cooking Techniques Matter More Than You Think
People can follow a Filipino recipe word-for-word, measure every ingredient precisely, time everything perfectly, and still end up with something that tastes… not quite right. The ingredients are correct, the timing was followed, but the authentic flavor isn’t there.
Nine times out of ten, it’s because the technique is off.
Maybe they didn’t cook the garlic long enough. Perhaps they boiled when they should have simmered. Maybe they stirred the paksiw too soon. These small technical differences create massive flavor differences in the final dish.
The Cultural Foundation of Filipino Cooking Methods
Filipino cooking evolved over centuries, blending indigenous methods with Chinese, Spanish, and American influences. Each technique was developed for specific reasons: preservation in tropical heat without refrigeration, maximizing flavor from limited ingredients, or adapting foreign cooking methods to local tastes.
These aren’t random cooking methods. They’re cultural knowledge encoded in how we prepare food, passed down through generations, refined through centuries of practice.
The Six Core Filipino Cooking Techniques
Most Filipino dishes use one or more of these fundamental techniques:
- Ginisa (sautéing with aromatics)
- Prito (frying in various styles)
- Ihaw (grilling over charcoal)
- Nilaga (boiling and gentle stewing)
- Adobo/Paksiw (braising in acidic liquids)
- Ginataan (cooking in coconut milk)
Master these six techniques, and you can authentically prepare about 90% of Filipino home cooking. That’s not an exaggeration. Most of what Filipino families eat day-to-day revolves around these core methods.
Ginisa: The Art of Filipino-Style Sautéing
Ginisa comes from the Spanish word “guisa” (to sauté). It’s the absolute foundation technique for countless Filipino dishes. It is probably the single most important Filipino cooking method to master. This is how Filipino food gets its characteristic flavor base. Get this right, and your dishes will taste authentically Filipino. Get it wrong, and something fundamental will feel missing.
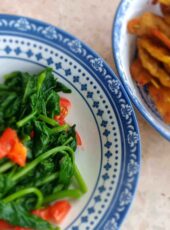
Common dishes using ginisa are ginisang kangkong (sautéed water spinach), giniling na baboy (ground pork), menudo, and pinakbet, all start with ginisa.
The Key Differences: Filipino Ginisa vs. Western Sautéing
Understanding these differences is crucial:
Western-style sautéing:
- Light, quick sauté
- Garlic just fragrant, never colored
- Quick cooking to preserve texture
- Aromatics as accent, not foundation
Filipino ginisa:
- Longer, deeper cooking of aromatics
- Golden, toasted garlic (essential!)
- Aromatics break down and meld together completely
- Creates the actual flavor base, not just seasoning
The Basic Ginisa Process in a Glimpse
- Heat oil (more than Western recipes typically call for)
- Cook garlic until golden and fragrant (not pale, not burnt)
- Add onions and cook until translucent and sweet
- Add tomatoes (if using) and cook until jammy and broken down
- Add your main ingredient (meat, vegetables, etc.)
The aromatics should be completely soft, sweet, and integrated, not crunchy or raw-tasting.
Prito: Filipino Frying Techniques for Crispy, Golden Perfection
Prito means fried. Filipino frying has specific techniques that differ from Western methods.
Essential Filipino Frying Tips
Temperature test without a thermometer: Drop a small piece of bread into the oil. It should turn golden brown in 30-40 seconds, perfect! Browns instantly? Too hot. Takes forever? Too cold.
Alternative test: Dip a wooden chopstick or spoon handle into the oil. Small bubbles forming immediately and steadily around the wood mean it’s ready. No bubbles = too cold. Violent bubbles = too hot.
Best practices:
- Use neutral oil (vegetable, canola, or palm oil)
- Heat oil properly before adding food
- Never overcrowd the pan. Cook in batches
- Drain on a wire rack (keeps bottom crispy)
- Season immediately while hot
- Keep a lid nearby to smother any oil fires (never use water!)
Ihaw: Grilling the Filipino Way
Ihaw means grilled over open flame, traditionally using charcoal for essential smoky flavor. The combination of smoky charred flavor plus outdoor cooking plus gathering with family creates the perfect social cooking experience. Grilling is rarely solo in Filipino culture, it’s about community.
Classic dishes: Inihaw na liempo (grilled pork belly), inihaw na manok (grilled chicken), inihaw na isda (grilled fish), chicken inasal, pork barbecue skewers, and inihaw na pusit (grilled squid).
The Secret to Perfect Ihaw
Charcoal is king: Gas grills work in a pinch, but charcoal creates the authentic smoky flavor that defines ihaw.
Marinades matter: Most ihaw dishes use marinades with soy sauce, calamansi, garlic, and sometimes annatto. Marinate for at least 2 hours, ideally overnight.
Basting while grilling: Keep brushing with marinade or oil mixture during grilling. This creates layers of flavor and prevents drying out.
Don’t rush it: Medium heat, not blazing hot. You want char, not burnt exterior with raw interior.
Nilaga: The Art of Filipino Boiling and Stewing
Nilaga literally translates to “boiled,” but that simple translation doesn’t capture what this technique really is. It’s about extracting maximum flavor through gentle, patient simmering. Filipino stewing is fundamentally about patience. You’re letting time meld flavors, turn tough cuts tender, and create rich, flavorful broths from bones and meat.
Classic dishes: Nilagang baka (boiled beef), bulalo (beef shank soup), pochero, tinola (chicken ginger soup), and sinigang (sour soup).
The Nilaga Technique
- Start with cold water and bring to a gentle boil
- Skim thoroughly to remove impurities (this creates clear broth)
- Reduce to gentle simmer – just small bubbles breaking the surface
- Don’t rush it – low and slow develops deep flavor
- Add vegetables at the end so they don’t overcook
Marks of Perfect Nilaga
- Crystal clear broth (from proper skimming and gentle simmering)
- Fork-tender meat (falls off the bone with minimal effort)
- Deeply flavorful broth (rich and satisfying, not watery)
- Perfectly cooked vegetables (tender but maintaining shape and color)
Essential condiments: Patis (fish sauce) with calamansi, squeezed over individual servings to taste. Always served with steaming white rice.
Adobo: Braising in Vinegar and Soy Sauce
Adobo is simultaneously a specific dish and a cooking technique. The method of braising in vinegar actually predates Spanish colonization. It was originally a preservation method in tropical heat before refrigeration existed. The acid from vinegar plus salt from soy sauce equals natural preservation and incredible flavor development. It’s practical food science that tastes amazing.
The Adobo Technique
- Combine everything (meat, soy sauce, vinegar, garlic, bay leaves, peppercorns) in one pot
- Bring to a boil, then immediately reduce to simmer
- Don’t stir initially. Let it cook undisturbed for 20-30 minutes (this allows the meat to absorb flavor without breaking apart)
- Simmer until tender (30-45 minutes depending on cut)
- Optional: reduce sauce at the end for concentrated flavor
- Or add liquid for more sauce if you prefer
The Great Adobo Debate: To Stir or Not to Stir?
Traditional cooks say don’t stir for the first 20-30 minutes. The theory: meat absorbs flavor better when left undisturbed. Modern cooks stir occasionally to prevent sticking. Both camps produce delicious adobo; choose your preference!
Regional Variations
Adobong puti (white adobo): Uses only vinegar, no soy sauce. Common in Visayas. Lighter in color, tangier in taste.
Adobo sa gata (coconut milk adobo): Adds coconut milk for richness. Bicol region specialty. Creamier, richer, less sharp.
Adobong tuyo (dry adobo): Reduces sauce completely for concentrated flavor.
Ginataan: Mastering Filipino Coconut Milk Cooking
Ginataan refers to any dish cooked in coconut milk (gata). This technique is especially prominent in the Bicol region.
Classic dishes: Bicol Express, laing (taro leaves), ginataang kalabasa (squash), ginataang hipon (shrimp), ginataang langka (jackfruit).
Essential Tips for Perfect Ginataan
Use full-fat coconut milk: Low-fat versions don’t have the same richness or cooking properties. They separate more easily and lack flavor.
Never let it boil rapidly: High heat causes coconut milk to separate, break, and become oily. Gentle simmer only!
Stir gently but regularly: Prevents sticking and burning on the bottom, which would ruin the entire dish.
Add coconut milk in stages: For better texture control and flavor development.
If it does separate: Don’t panic! Whisk vigorously or add a tablespoon or two of water while stirring. Often you can bring it back together.
The visual test: Your ginataan should look creamy and homogeneous, not oily with separated liquid. If you see excessive oil pooling on top, you’ve cooked it too hot or too long.
Sinangag: The Perfect Filipino Garlic Fried Rice
Garlic fried rice is the absolute breakfast staple of Filipino cuisine. Part of the holy “silog” trilogy (sinangag + itlog + meat). Day-old rice is essential. This isn’t optional. It’s fundamental to the technique.
Why Day-Old Rice is Non-Negotiable
Fresh rice problems: Too moist, clumps together, becomes mushy and sticky when fried, absorbs too much oil, never gets crispy.
Day-old refrigerated rice advantages: Dried out slightly, grains separate easily, maintains individual texture, absorbs less oil, gets beautifully crispy.
As rice cools and sits, starches crystallize and firm up. This makes grains firmer, less sticky, and perfect for frying.
The Perfect Sinangag Technique
- Use day-old refrigerated rice (break up clumps with hands before cooking)
- Heat generous oil in pan or wok
- Cook lots of minced garlic until golden (not burnt!)
- Add rice and break up any remaining clumps
- Press rice into pan occasionally (creates crispy bits)
- Season with salt to taste
- Look for individual grains that are slightly toasted and separated
Essential Filipino Cooking Tips for Home Cooks
Tip #1: Taste As You Go (Most Important!)
Filipino cooking is intuitive and adaptive, not precise like baking. Your soy sauce might be saltier than mine, your vinegar more sour, your fish sauce a different intensity. Taste throughout cooking and adjust constantly. Recipes are guidelines, and your palate is the final authority.
Tip #2: Don’t Fear Fat
Filipino cooking traditionally uses oil generously. This creates proper texture, carries flavors, and prevents sticking. If you want to reduce fat, do it gradually; cutting all fat dramatically changes texture and flavor. Reduce by 25% and see how you feel about the results before cutting more.
Tip #3: Cook with All Your Senses
Listen: Proper sizzling tells you the oil is hot enough. Gentle bubbling means simmer is right.
Smell: Garlic fragrance tells you when to move to the next step. Any burning smell means act immediately!
Look: Color changes guide doneness. Golden garlic vs. pale garlic. Clear broth vs. cloudy.
Touch: Meat texture tells you tenderness. Rice texture tells you moisture level.
Taste: Your most important sense! Trust your palate and adjust accordingly.
Tip #4: Make Friends with Fish Sauce
Yes, patis smells strong and funky in the bottle. Many people are initially put off. But when cooked, fish sauce adds incredible umami depth that makes dishes taste richer and more complete.
Use less than recipes call for initially, taste the dish, then gradually add more until you find your comfort level. You’ll likely end up using full amounts eventually!
Tip #5: Embrace Leftovers (They’re Often Better!)
Many Filipino dishes actually taste better the next day: adobo, menudo, afritada, kare-kare, most stews and braised dishes. Why? Flavors meld and deepen overnight, spices integrate fully, and meat absorbs more sauce.
Planning tip: Cook dishes that improve with time, refrigerate overnight, and enjoy even better flavors the next day!
Tip #6: Keep It Simple
Filipino home cooking isn’t fancy or complicated. It’s about good technique with simple ingredients, quality basic components, proper cooking methods, and love and attention. Avoid adding unnecessary ingredients or overcomplicating simple dishes. The best Filipino food is often the simplest.
Tip #7: Adjust for Your Family’s Preferences
There’s no single “authentic” version of most Filipino dishes. Every family has their own version of adobo, sinigang, menudo, everything! You decide how sour your sinigang should be, how much vinegar in your adobo, and how much garlic is enough. Make it yours because that’s exactly what every Filipino family has done for generations!
Frequently Asked Questions
Q: Do I really need Filipino-specific ingredients to learn these techniques?
For learning the techniques themselves, what matters most is the method. You can practice ginisa with any garlic and onions. You can learn nilaga by simmering with any meat and vegetables. However, certain ingredients (Filipino soy sauce, cane vinegar, calamansi, patis) do create authentic flavors that substitutes can’t quite replicate. Learn the techniques with whatever you have, then gradually incorporate authentic ingredients as you’re able.
Q: Why does my adobo taste different every time?
This is expected! Ingredients vary. There are different soy sauce brands, vinegar acidity, meat cuts, and cooking varies (simmer time, ratio adjustments, reduction amount). This variability is fine, it’s a feature, not a bug. Filipino cooking embraces this flexibility. Taste and adjust each time. Ask ten Filipino families for their adobo recipe, and you’ll get ten different answers, and they’re all “authentic”!
Q: Can I use a slow cooker or Instant Pot?
Yes, with modifications. For slow cookers, do the ginisa step in a pan first, then transfer. Add vegetables in the last hour. For Instant Pot, it saves time but quick cooking means less flavor development than traditional stovetop methods. Use modern appliances when time is tight, but traditional methods produce the most complex, developed flavors when you have time.
Q: What’s the single most important technique to master first?
Ginisa (Filipino-style sautéing), without question! Once you master it, dozens of recipes become accessible. Practice until you can create perfect golden garlic, sweet onions, and jammy tomatoes automatically. Once this is natural, everything else becomes easier.
Q: I’m vegetarian/vegan. Do these techniques still work?
Absolutely! Most techniques translate beautifully to plant-based cooking. Ginisa works perfectly with tofu, tempeh, or mushrooms. Nilaga-style vegetable stews use identical simmering (use mushroom powder for umami instead of fish sauce). Adobo technique works with tofu or vegetables. Many ginataan dishes are naturally vegetarian. The techniques remain unchanged, you’re just applying them to different ingredients!
Start Practicing Today
Don’t wait for the perfect ingredients or the perfect day. Start now with what you have.
Choose one technique from this guide. Perhaps ginisa with its golden garlic base, or the art of making perfect sinangag from day-old rice. You might even try mastering the gentle simmer of nilaga.
Cook it once. Then cook it again. And again. Pay attention to sounds, smells, colors, textures. Taste and adjust. Notice what works and what doesn’t.
Filipino cooking isn’t complicated, but it does require practice. The good news? Every practice session results in food you can eat! Even imperfect adobo is still pretty delicious.
Your grandmother didn’t learn to cook from reading. She learned from doing. So start doing. Start cooking. Start practicing these techniques.
Here’s what I’ve learned after years of cooking and sharing Filipino food: techniques matter more than exact recipes. You can substitute ingredients in a pinch and still make something delicious if your technique is solid. But perfect ingredients with wrong technique produce disappointing food.
These techniques aren’t arbitrary rules. They’re accumulated wisdom from generations of Filipino cooks who figured out what works, what tastes good, what makes sense in tropical heat, and what maximizes flavor from simple ingredients.
Mastering ginisa connects you to every Filipino cook who has stood at a stove, watching garlic turn golden. Learning to simmer nilaga gently carries on a practice Filipino grandmothers have cherished for centuries. Perfecting sinangag with day-old rice keeps alive a beloved Filipino breakfast tradition.
These techniques are cultural knowledge passed down through practice, observation, and eating. The best way to learn Filipino cooking is to cook it, eat it, adjust it, and cook it again.
Start with one technique. Master it. Move to the next. Before long, you’ll find yourself cooking Filipino food instinctively, adjusting by taste, understanding not just what to do but why you’re doing it.
That’s when Filipino cooking stops being recipes you follow and becomes cooking you understand, techniques you’ve internalized, methods that make sense, skills you own.
That’s when you’re really cooking Filipino food.
Ready to Put These Techniques Into Practice?
Now that you understand the core techniques, it’s time to start cooking!
Want to dive deeper into Filipino food culture? Read our guide on Filipino Food Culture: History, Flavors, and Traditions.
Save this post and share it with your friends! Find us on Facebook, Pinterest, and Instagram for your next culinary adventure.